Orbot’ing into the Fediverse

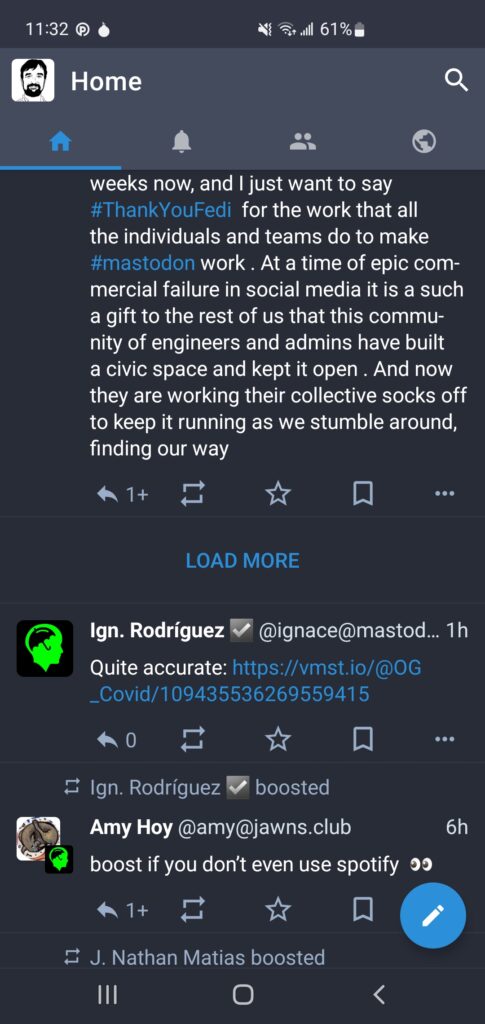
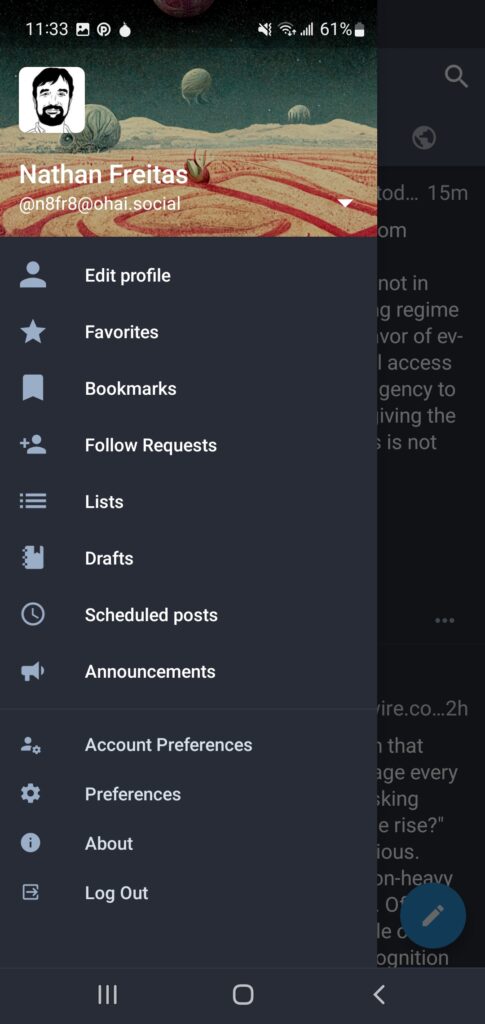
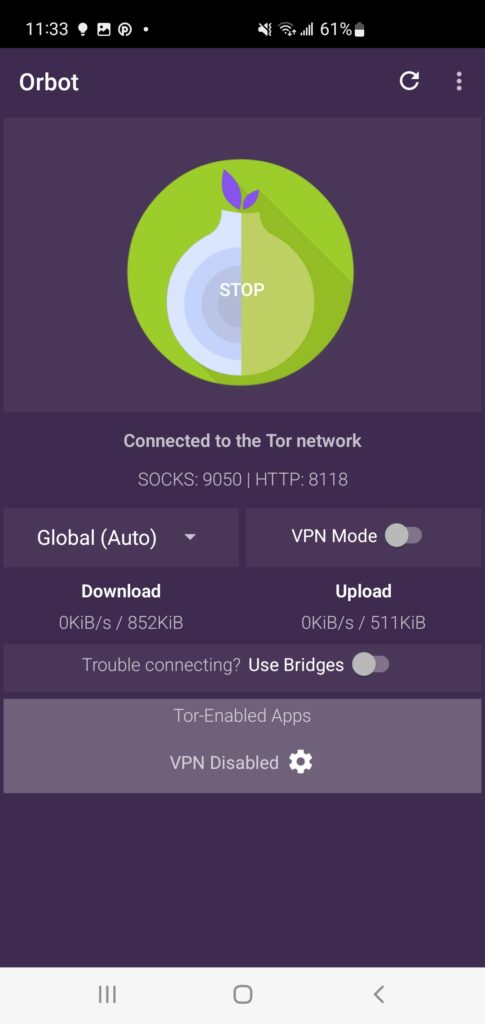
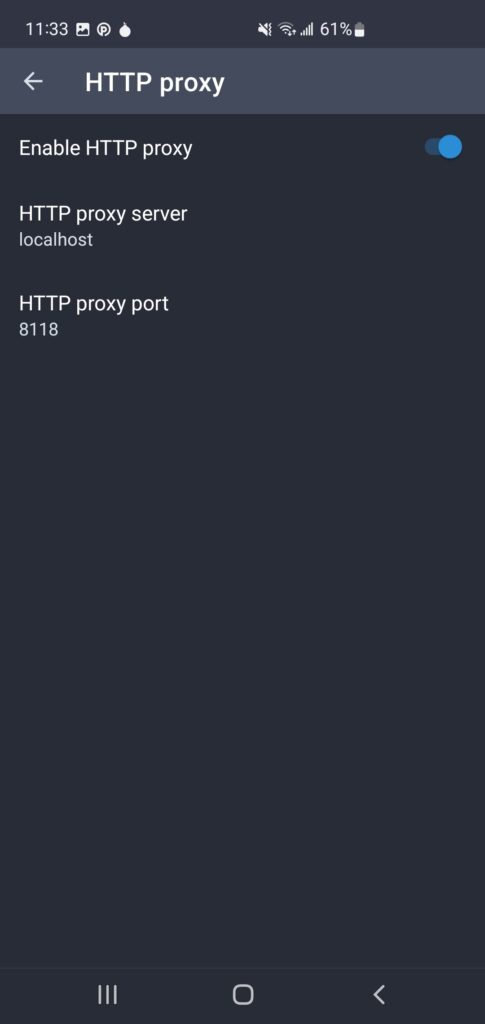
Tusky is an open-source Mastodon client for Android. It is usable, beautiful, and completely free and open-source. It also, fortunately, supports a key feature to enable easy proxying of all of its traffic. While you can use it with any standard HTTP proxy you might have, you can also configure it to use the “localhost” proxy provided by Orbot: Tor for Android.

Why would you want to do that? Orbot provides you free access to the global, volunteer-driven Tor onion-routed network, that protects your traffic from surveillance, interference, and censorship. It also stops your actual IP address from being visible to any server you connect to, including the Mastodon instance that you have configured Tusky with. Lastly, I happen to be the lead developer of Orbot, and I use and endorse this solution with all of my onion-ringed heart.

If you are concerned about your access to Mastodon being tracked or blocked, or don’t fully trust the logging hygiene of your instances admin, then I suggest you enable HTTP proxy through Orbot.

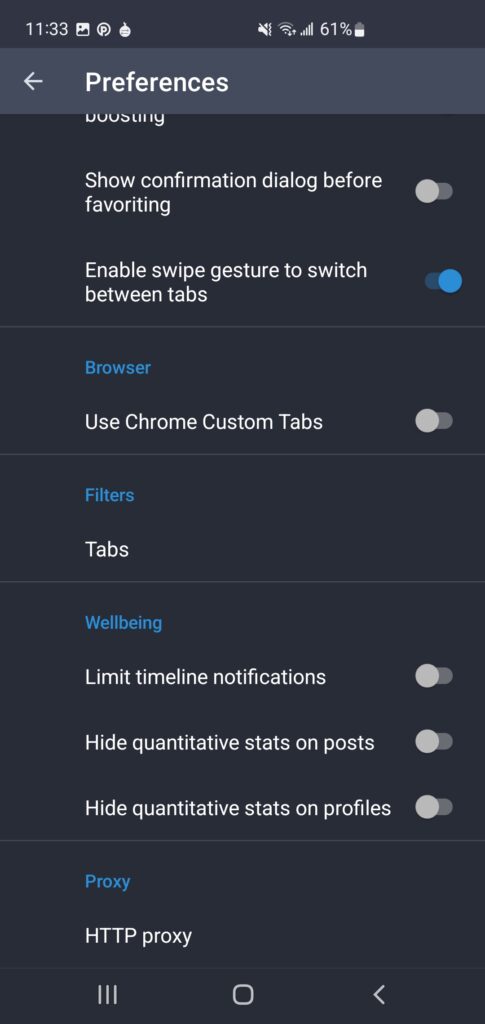
Just look in Tusky’s Preferences screen at the very bottom, and enable HTTP proxying to server “localhost” and port 8118. You also need to install Orbot and start it up (though you do NOT need to enable VPN mode for this).

Another small step for a Tibetan keyboard on Android

There has been a lot of excitement this week about the robust support for the Tibetan written language in Apple’s iOS 4.2 for iPhone and iPad. This is a fantastic achievement that many contributed to, and that Apple should be loudly applauded for.

Unfortunately, the state of Tibetan on Android is still poor, but not hopeless. While Tom Meyer has provided a great starting point for rendering text properly, I still am not aware of any means for inputing Tibetan characters. With that in mind, I set out to investigate the ability to create a new Tibetan “Input Method” (as Google calls it) for Android, and quickly realized that one could just write a Language Pack add-on for the open-source AnySoftKeyboard project. This solution still requires you to root your phone and install the Dzongkha”རྫོང་ཁ font, but is still a step in the right direction!

You can find the open-source code for my new project, the Tibetan AnySoftKeyboard Language Pack on Github. If you would like to try it out, you must have a rooted device with the Dzongkha”རྫོང་ཁ font installed, then install the “AnySoftKeyboard” from the Android Market, then you can install the first test Add-on APK file, and the Tibetan option should come up in keyboard settings.

Below you can see a screenshot of the initial keyboard writing text into the OI Notepad app. It appears to be properly stacking characters as well, but I may be wrong. Also the current implementation does not yet support the SHIFT key or other modifiers. I would love to have some help setting up the rest of the QWERTY mappings in this XML file. Otherwise, any other comments, feedback, advice or pointers to other Android Tibetan keyboard work would be much appreciated!

Searching and Playing YouTube Videos using Appcelerator Titanium

This tutorial is part of content I am developed for the NYU ITP course I am teaching this semester, “Social Activism using Mobile Technology”. You can find the original document posted here. This code comes from the open-source project (of which I am the lead developer) located here: http://github.com/nysenatecio/NYSenateMobileApp. If you want to see this code “in action”, download the NYSenate Mobile app for iPhone, iPad or Android.
This tutorial will demonstrate using the Appcelerator Titanium Mobile API, a Javascript-based cross-mobile-platform toolkit, how to accomplish the following feats in a mobile app:
  • Search for video by channel name or keyword from the YouTube API
  • Use the Titanium HTTP client for async XML requests and response handling
  • Retrieve video results from YouTube and display thumbnail & text in a table
  • Create a WebView window and use it to display YouTube video player
  • Hand-off YouTube video links to the OS for external playback

All in all, following this tutorial, you should be able to perform the basic functions you would need to build an app that front-ended video content stored on YouTube.

First, we declare our variables:

//this is the main app window

var win = Titanium.UI.currentWindow;
//this creates a spinning widget we can display while the user waits

var toolActInd = Titanium.UI.createActivityIndicator();
//this is the table we will load videos into

var tableview;
//and the data array for the table

var data = [];
//the window and webview for displaying youtube player (iOS only)

var webModal;

var webModalView;
//stores the current link being displayed in the web view

var currentLink;
//this is the network request object

var xhr = Ti.Network.createHTTPClient();

Now you need to declare a function that knows how to play YouTube videos on iOS and Android. Every YouTube video has a GUID (globally unique id – or at least unique for YouTube) and a title. You pass those two values to this function and it will either launch the YouTube player directly (Android) or display a thumbnail with playbutton that the user can launch (iOS).

function playYouTube (vtitle, vguid)
{
if (Titanium.Platform.name == ‘iPhone OS’)
{
var ytVideoSrc = “http://www.youtube.com/v/” + vguid;
var thumbPlayer = ‘<html><head><style type=”text/css”> body { background-color: black;color: white;} </style></head><body style=”margin:0″><br/><br/><center><embed id=”yt” src=”‘ + ytVideoSrc + ‘” type=”application/x-shockwave-flash” width=”100%” height=”75%”></embed></center></body></html>’;

showHTMLContent(vtitle,’http://www.youtube.com/watch?v=’ + vguid,thumbPlayer);
}
else //on android
{
//this call to openURL hands off the link to the operating
//system, and starts any player that supports youtube.com
Titanium.Platform.openURL(‘http://www.youtube.com/watch?v=’ + vguid);
}
}

The reason you show an embedded YouTube thumbnail player on iOS, is that it will allow the video to play inside of the app without leaving the context of the app. This was more a problem on the non-multitasking iOS 3.x, and is still an issue on the iPad until iOS 4.2.

In the function above, there is a showHTMLContent() function call. This function is not built-in, and is just a way to simplify the common need to show some bits of HTML markup within your app. The arguments for the function are a title of the page, an optional URL to the source content of the page, and the direct HTML markup content to display.

function showHTMLContent(wTitle, wUrl, wHTMLContent)
{

//store the link for later use
currentLink = wUrl;

//create the window to hold the web view
webModal = Ti.UI.createWindow({});

//set the orientation modes for basically any which way
webModal.orientationModes = [
Titanium.UI.PORTRAIT,
Titanium.UI.LANDSCAPE_LEFT,
Titanium.UI.LANDSCAPE_RIGHT
];

//create the webview aka the embedded web browser (webkit/safari)
webModalView = Ti.UI.createWebView();
webModalView.scalesPageToFit = true;

//add the web video to the modal window
webModal.add(webModalView);

//set the title of the window
webModal.title = wTitle;

//if you are using a tab UI in the app, this will open the window
Titanium.UI.currentTab.open(webModal,{animated:true});

//set the HTML to display to the markup passed into the function
webModalView.html = wHTMLContent;

};

Great, so now we have the ability to display a YouTube player within our app using an embedded WebView. Pretty awesome so far, and hopefully you see how might use components like WebView for other mashups of native and web content in your apps.

Now we need to demonstrate how to get the data from YouTube on what videos are available. For this, we create another function called “doYouTubeSearch()”. This function takes two parameters: you can specify the channel name to retrieve videos from, or you can specify a search term, and you can combine these as well, to search videos from a specific channel only.

function doYouTubeSearch (channel, searchTerm)
{

//first show a “loading” spinning indicator to the user
toolActInd.message = ‘Loading videos…’;

win.setToolbar([toolActInd],{animated:true});

toolActInd.show();
//create the YouTube API search URL from the function parameters
var searchUrl = ‘http://gdata.youtube.com/feeds/api/videos?alt=rss&author=’ + escape(channel) + ‘&q=’ + escape(searchTerm) + “&orderby=published&max-results=25&v=2”;

//use the xhr http client object to do an HTTP GET request to the URL
xhr.open(“GET”,searchUrl);
xhr.send();
}

That was all pretty straightforward, right? You build up a URL, and you make the request using it for data from YouTube. Now, how you receive the response to that request is our next step. To do this, you must define an “onload” function for the ‘xhr’ object.

It is in this function that you will receive the data back from YouTube (usually in JSON or XML format), and you can process it to display in your app.

xhr.onload = function()
{
try
{

//the doc object holds the response structure

var doc;

//check whether the data coming back is in XML format or not

if (!this.responseXML)
{
//if not XML you have to convert it to XML
doc = Titanium.XML.parseString(this.responseText).documentElement;
}
else
{
//if it is XML, then just set the doc variable
doc = this.responseXML.documentElement;
}

//now we can easily get a list of items from teh results
var items = doc.getElementsByTagName(“item”);

//some simple variables for tracking the loop
var x = 0;
var c;

//now just loop through the response array to see what videos we have

for (c=0;c<items.length;c++)
{
//get the current item
var item = items.item(c);

//get the text for the video title tag using standard DOM XML calls
var title = item.getElementsByTagName(“title”).item(0).text;

//build up a summary string to display below the title
var summary = “”;
if (item.getElementsByTagName(“pubDate”))
{
summary = item.getElementsByTagName(“pubDate”).item(0).text;
}

//get the link to the youtube video
var link = “”;

if (item.getElementsByTagName(“link”))
{
link = item.getElementsByTagName(“link”).item(0).text;
}

//now here is where we perform a trick
//we find the GUID code from within the link b/c we know the link format
var guid = link.substring(link.indexOf(“?v=”)+3);
guid = guid.substring(0,guid.indexOf(“&”));

//now we can use that guid to load up a thumbnail image
var thumbnail = “http://i.ytimg.com/vi/” + guid + “/2.jpg”;

//okay we have all the data we need for that item
//now we need to create a row to add to the table in order to display it

//create the row item and set the height to 80 pixels
var row = Ti.UI.createTableViewRow({height:80});

//set parameters for the row so we can get the youtube data out later
row.url = link;
row.guid = guid;
row.videotitle = title;

//create a label for displaying the title and add it to the row
var labelTitle = Ti.UI.createLabel({
text:title,
left:105,
top:10,
height:40,
font:{fontSize:16}
});
row.add(labelTitle);

//create a label for the summary and add it to the row
var labelSummary = Ti.UI.createLabel({
text:summary,
left:105,
top:45,
font:{fontSize:12}
});
row.add(labelSummary);

//create an image from the thumbnail, and add it to the row
var img = Ti.UI.createImageView({
url:thumbnail,
left:0,
height:80,
width:100
});
row.add(img);

//add the row to the data array
data[x++] = row;

}

//if tableview has been created, reset the data on the table
//you can update data on the table multiple times
if (tableview)
{
tableview.setData(data);
}
else
{

//if table has not been created, build it up with the data array
tableview = Titanium.UI.createTableView({
data:data
});

//add the table to the current window for display
Titanium.UI.currentWindow.add(tableview);

//add a ‘click’ listener so that when someone taps on a row
//the video will be played using the function we defined earlier
tableview.addEventListener(‘click’,function(e)
{
playYouTube(e.row.videotitle,e.row.guid);
});

}
}
catch(E)
{
//if anything bad happens, show the error to the user and log it
Titanium.API.debug(E);
Titanium.UI.createAlertDialog({title:’NY Senate’, message:’No videos were found for this search.’}).show();

}

//hide the spinning ‘loading’ widget
toolActInd.hide();
win.setToolbar(null,{animated:true});
};

Okay, so that was a lot I know, but go back through it a few times, and you will see it is not so hard. First, we get XML back from YouTube. Then, we turn that XML into an array of items. Them we loop through those items and build up an array of rows. Then, we set the table with that array, and display the table. Finally, we handle the ‘click’ or touch events on the row, and display the YouTube player in the embedded webview. Ta-da! You now have a customizable YouTube search and player app.

Now here are three examples how you might kick off all this activity.

First, in this case, we are doing a search for any video in the ‘NYSenate’ YouTube channel.

doYouTubeSearch(‘NYSenate’,”);

In this example, we are searching all of YouTube for a “skateboard dog”.

doYouTubeSearch(”,’skateboard dog’);

Finally, in this example, we are

doYouTubeSearch(‘NYSenate’,’Brooklyn’);

In review, this lesson has showed you how to display HTML web content, how to create YouTube players embedded in that content, how to make HTTP requests to web services and APIs, how to parse the XML returned from those services, and how to display data in a Table format.

This example was built upon code that comes from the open-source project located here: http://github.com/nysenatecio/NYSenateMobileApp so go grab the code there and use it as a basis of your own app!

The “Took”: Tibetan-enabled Nook eReader

Thanks to amazing work by Tibetan font experts Tom Meyer and Chris Fynn, as well as the Barnes and Noble Nook eInk reader device hackers at NookDevs.com, I have modified my $199 Nook  ($149 if you get the wifi only model!)  to support proper rendering of Tibetan characters. This is dynamic rendering of Unicode text, and not just static pre-rendered images.

You might have seen an earlier post I wrote about this here, and I’ve essentially done the same thing this time, but with an important addition of code from Tom that properly stacks the characters (a critical feature often not available in an OS font library), and a new Tibetan font (actually Bhutanese) from Chris which is small, lightweight and efficient enough to be used on Android. All together this provides support for reading Tibetan text on web pages, and within full application user interfaces, eBooks and more.

With up to 32gb of storage possible via the tiny micro SD Card, this one device could probably store and serve up the majority of Tibetan Buddhist texts, not to mention literary, poetic and historic works, that exist, all in a lightweight, energy-efficient device. Since the device is also networked, you can use it to pull down the latest Tibetan language online news and blogs.

And yes, this is all possible because the Nook is based on the free, open-source Android operating system. Yay for freedom in all forms!

This is support for both web pages, as well as full applications on the device.

The Droid's Dharma: Supporting the Tibetan Language on Android

DISCLAIMER: I am by no means an expert in this issue – I am just an an enthusiastic hacker with a dream. Also I don’t read Tibetan, but I enjoy looking at it!

Thanks to the open-source movement and the hard work of many Tibet supporters and typography experts, I am happy to announce that  rendering of Tibetan characters is now supported on the most fantastic of mobile smartphones, Google Android!!!

YarlungRaging2.JPG
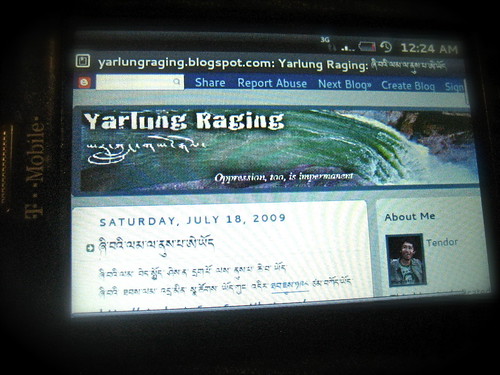
Tendor’s Yarlung Raging blog viewed on a T-Mobile myTouch3G Android Phone

While it only has a small alphabet of characters, the Tibetan language has been notoriously difficult to support on Mac, Windows and Linux due to some complexities in how one character can modify the next. Dedicated academics, volunteers and software engineers have stayed focused on solving this and the most recent versions of all major operating systems are able to render Tibetan and provide Tibetan character input tools. Google Android is based on Linux, and fortunately is able to support the use of the GPL-licensed Tibet Machine Unicode font.

YarlungMobile1.jpg

However, by default Android only has a small number of fonts built-in, and doesn’t support the easy addition of new fonts or locales. It does however have something called the “fallback” font, which is used to render any encoded text it comes across that it doesn’t quite know what to do with.

What I realized is that you could replace this font with a Tibetan unicode font compatible with Linux, and that this would then enable Tibetan support in all applications on Android, including the web browser, email apps, instant messaging, and short messaging (SMS), among others.

The steps below outline the technical how to for Android users.


WARNING: This is not for novices. However, it isn’t rocket science either. Your average neighborhood mobile phone enthusiast should be able to figure out how to do this, and potentially help their friends do it too. Down the road, I hope we can make this process easier and/or Google will allow for the addition of any font to the system.

Step 1: Get Root on your Android device. You don’t need to mod your phone with a custom firmware, you just need root access to change system fonts. Here’s some places to start looking on how to (this changes weekly, btw, and differs for each type of Android phone):

Step 2: Download Tibet Machine Unicode font. You can learn more about the variety of Tibetan fonts available here.

Step 3: Make the system font folder writeable and backup the existing font
This can be done using desktop ‘adb’ tool from the SDK or the Android terminal app on the device

# su
# mount -o remount,rw -t yaffs2 /dev/block/mtdblock3 /system
# chmod 777 /system/fonts
# cd /system/fonts
# mv DroidSansFallback.ttf DroidSansFallback.ttf.bak
# exit

Step 4: Write the Tibetan unicode font as the new fallback font:
Using ADB Desktop tool with Android connected via USB

adb push TibMachUni-1.901b.ttf /system/fonts/DroidSansFallback.ttf

Using on-device terminal app:

#cd /system/fonts
#wget -o DroidSansFallback.ttf http://tinyurl.com/tibfont /system/fonts/DroidSansFallback.ttf

Step 5: Reboot your Android phone

Step 6: Point your Android browser at http://yarlungraging.blogspot.com, http://lobsangmonlam.org/ or http://tb.tibet.cn to verify the Tibetan font support is properly installed.

What’s Next

Two big steps from here… this is a call to action for Android developers out there:

  • Develop a one-click app that can install Tibetan (or any other third-party language) font for any rooted device
  • Port an existing Java-based Tibetan input utility into Android as an Input Method Editor so that you can have a way to write Tibetan character emails, SMS messages and blog posts.

Many thanks to the authors and developer behind the following posts upon whose work this effort was based:
karuppuswamy.com: How to change fonts in Android?
karuppuswamy.com: Mounting /system partition in read-write mode in Android
android-devs.com: Adding Additional Language Fonts to Android